Monday, August 27, 2012

Nail Polish Collection

Hello Everyone,

I wanted to share with all of you the nail polishes I have. Give you some ideas of colors you might want to get.

Also if you have any color recommendations please post them below because i am always looking for new colors.

Below are the pictures with details such as names and a little description of the colors.

THE WHOLE COLLECTION

OPI Minis (From left to right)

*Alpine Snow...Matte white

*Bubble Bath...Pinky nude (extremely sheer...you need to apply 3 coats to achieve good pigmentation

*Tickle My France-y...Nude brown

*Strawberry Margarita...Intense Pink (gorgeous)

*Cajun Shrimp...Red orange

*Big Apple Red...The name says it all (Red)

*Excuse Moi!...Redish glitter polish (apply at least 2 coats to achieve a good amount of glitter)

*I'm Not Really a Waitress...Dark Red

*Wocka Wocka!...Wine color with sparkles

*Designer...de Better!...champagne bronze with gold sparkles

*Warm and Fozzie...dark brown bronze with pink sparkles

*You Don't Know Jacques!...Matte light brown

*Lincoln Park After Dark...Dark purple

*Russian Navy...Dark blue

OPI Full Size

*Rumple’s Wiggin’...Light matte lavander color

*Fiercely Fiona...Matte yellow green

*What's with the Cattitude...matte light sky blue

*Gone Gonzo!...Clear polish with heavy light blue small glitter and silver glitter chunks

*Divine Swine...Clear polish with heavy dark pink small glitter and silver glitter chunks

*Black Shatter...Black top coat which creates fun crack designs on top of your base polish

ORLY

*Top Coat

*Decades of Dysfunction...pink/brown neutral polish

*Gumdrop...Greenish blue polish (comparable to For Audrey)

CHINA GLAZE

*Lemon Fizz...light yellow

*For Audrey...tiffany blue

ESSIE

*Naked Truth...nude pink (extremely sheer)

*Cute as a Button...bright almost neon pink

*Carry On...Very dark plum purple
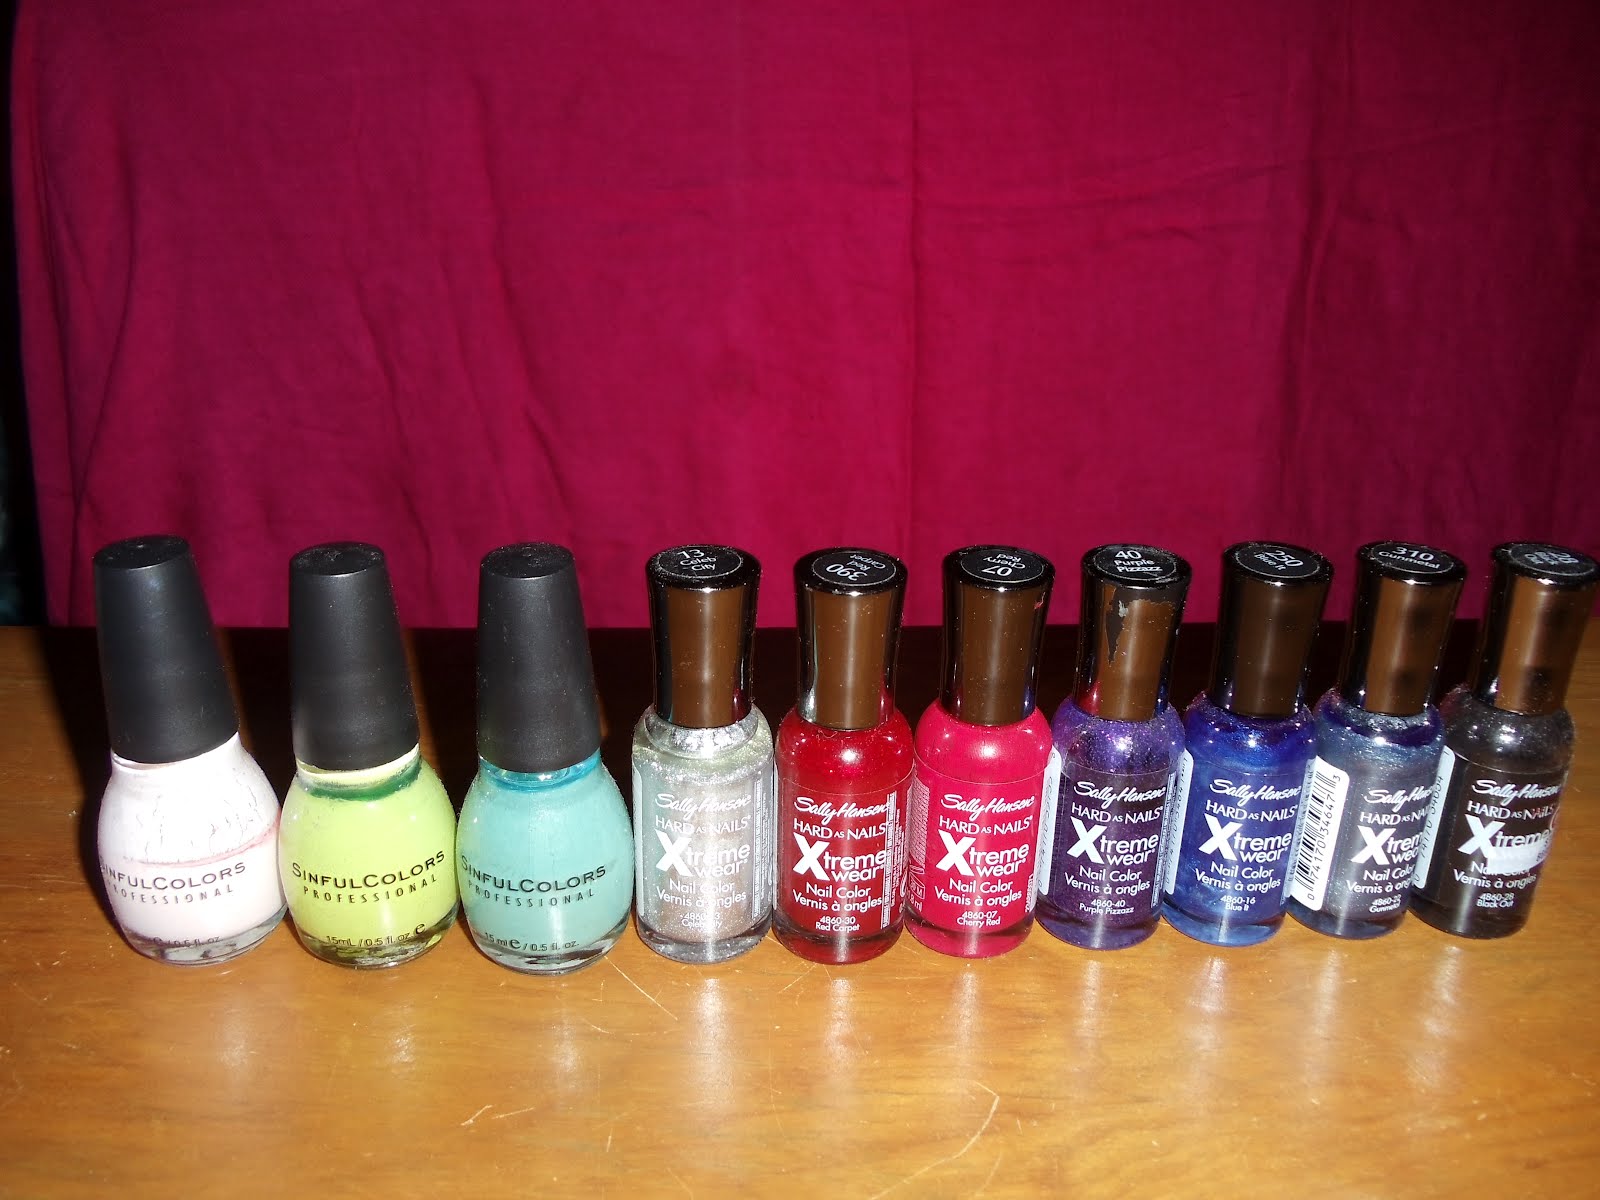
SINFUL COLORS

*Easy Going...light nude pink for being a drugstore polish has great pigmentation

*Innocent...light green

*Mint Apple...green/bluish polish with silver shimmer

SALLY HANSEN HARD AS NAILS XTREME WEAR

*Celeb City...Shimmery silver

*Red Carpet...Shimmery dark red

*Cherry Red...Bright red

*Purple Pizzazz...Shimmery dark purple

*Blue It...Shimmery dark blue

*Gunmetal...Shimmery dark gray

*Black Out...True black

MISCELLANEOUS

*Seche Vite Base Coat

*Seche Vite Top Coat

*NYC Top Coat

*NYC New York Color Minute in Little Italy...matte white

*Chelly in Shade #77...light brown

*Chelly in Shade #75...Light chocolate brown

*CQ Sienna Cream...Dark redish brown

*LA Colors French Nail Pink...light peachy pink

*Revlon Peach Smoothie...light peachy pink with multicolor shimmer

*Wet and Wild Wild Shine in Sunny Side

*Julep Mandy...matte coral red

*Julep Helena...matte neon violet

*Julep Heather...dark shimmery brown bronze

*LA Colors Art Deco (Ice Breaker)...silver glitter

*LA Colors Art Deco (Purple/Blue Glitter)

*LA Colors Art Deco (White)

*LA Colors Art Deco (Intense Pink)

*LA Colors Art Deco (Bright Green)

FTC disclaimer: All these polishes were bought with my own money or given to me by family members and friends. and I am not being sponsored by any company or being compensated for this blog.

Talk to you guys soon

XOXO

Carmen

Wednesday, August 22, 2012

The Double French

Hello Everyone,

Today I want to share a new tutorial with all of you. I call this one the double french and you will see what I mean by looking at the picture.

What I love mostly about this particular design is that anyone can wear it. It is fun but discreet enough that you can wear it to go to work.

Let's get started...

Supply List

*Base coat

*Base color polish (Orly Decades of Dysfunction)

*Glitter polish (OPI Gone Gonzo!)

*Thin tip polish (LA Colors Art Deco White)

*Top coat

*Q-tips

*Acetone/ Nail polish remover

*Tape (Optional)

1) Clean nails, cut and file as you like

2) Add base coat and wait for it to dry (Only use if you are not using tape since tape will peal off the base coat).

3) Optional: Use tape to cover the top of the nail to create what is going to be the "french tip". This will avoid getting the base color on the tip.

You can free hand this if you like, just like i did.

4) Apply base color polish (two coats) wait in between coats.

Once the two coats have dried you can remove the tape if you used it and clean any smudges with a q-tip with acetone.

5) Apply the glitter polish to the unpainted top of the nail. You will need several coats depending on the polish you use.

Some glitter polish have a clear base with different color glitter and some have a tint to it besides the glitter.

6) Once you are happy with the amount of glitter on the tip wait for it to dry and apply one coat of top coat

You can stop here if you like how your nails look or add the white line to make it the double french

7) Make the white line right under the glitter part "carefully" so you dont go over the glitter which will cover it.

How to do the white line: Remove the excess white polish by moving the brush along the sides of the bottle. Hold the brush firmly, gently rotate your finger toward the brush while holding the brush still and advancing it slowly in the opposite direction that your finger is going. This will allow the brush to run along the nail in a straight line.

8) Wait for the white to dry.

9) Add two coats of top coat.

You are done.

If you have any requests or questions please leave them on the comments below. Also if you try any of the tutorials send me the link or picture to mafeee06@gmail.com. I would love to see them.

XOXO

Carmen

Monday, August 20, 2012

STRIPED NAIL TUTORIAL

Since summer is about to end I wanted to take advantage of having colorful nails and have fun. I came up with this easy nail design.

You can use any color you like and make each stripe as thick or thin as you want.

Let's start

What you will need:

*Two nail polishes in different colors (I used Julep in Helena and OPI Rumple's Wiggin)

*One thin tip polish in the color you want (L.A. Colors Art Deco in White)

*Top coat or clear polish

*Acetone or nail polish remover

*Q-tips

*Clear Tape

Optional

*Nail clipper

*Nail file

1) Make sure you have clean nails, without polish. Cut and file them to the desired lenght.

2) Grab your tape and place it on the nail diagonally. (Try to keep the "height" of the tape even among all your nails).

3) Apply two coats of the first color you want to use. Make sure to wait for each coat to dry before applying the next one.

4) After the two coats have dried. Carefully remove the tape.

OPTIONAL:* If you have some color smearing you can grab a q-tip with acetone and wipe it off.

5) Apply the second color to the upper part of your nail (Two coats). Watch for overlapping into the other color. I found that the easiest way to do this, is to start from the line that is dividing the two colors and then filling the rest of the nail.

6) After the two coats have dried. Apply one coat of top coat or clear polish and wait until it dries.

7) Add the white line with a thin tip polish in between the two colors in order to hide the two color division.

8) Wait for the white to dry and apply two coats of top coat to end the look.

*Don't forget to clean out the skin from outside of your nails.

Enjoy!

Hope you liked this tutorial. If you have any requests don't forget to leave them in the comments below or send me and e-mail to mafeee06@gmail.com

FTC Disclaimer: None of the products mentioned above have been given to me for free and I am not receiving any compensation for this blog.